Hello Friends,
I've been wanting to join with the folks playing at WOYWW (What is on your workdesk Wednesday) for a long time.
Kath is one of those wonderful bloggers that makes me want to sit and have a cup of coffee with her (I'm willing to admit it might be her wonderful Scottish brogue).
Julia is also a hoot. I love that she describes herself as a "talker with a passion for crafting". I almost started when Julia was nearing the anniversary but ... well, I didn't. Then I wanted to play last week and things got in the way. So, I'm starting this week and there is a good reason for THIS week.
I finally have a workdesk -- well a work island to be exact. You see, I work in my bedroom. It is a big room with my office, craft space, Wonderkid play area, and everything you could possibly imagine all in one room. I sometimes feel like I am back to living in a studio apartment inside a rather nice house. Not that I'm asking you to feel sorry for me. It is a large room (connected to the rest of the house through my sitting room and kitchenette). That being said, for the last two years all of my crafting happens either on the floor, the bed, on the counter in front of the microwave or at the child's table the Wonderkid received from the neighbors. It is doable but not ideal. My cricut has been living on the floor. My paper was stored under and on my office meeting table. Tools, buttons, ribbons and bits were in similar boxes all stacked willy nilly. Here is the floor of my space a couple of weeks ago.
 |
| A birthday banner in the foreground, rolls of vinyl, tools everywhere and boxes and boxes and boxes. This was the low point. |
 |
| Does anyone know how much is too much adhesive? |
 |
| Tools, tools, everywhere. |
The frustrating thing is I received shelves for my birthday back in March and hadn't had a chance to pick them up and then didn't get a chance to put them together. I created my space based on a description from Diane at Capadia Designs. She talks about her scrap island
here (there are a total of 5 posts). In addition,
Shimelle also mentions her storage which includes the
Expedit shelves from Ikea (the base for the entire island). For the life of me I can't find the post where she talks about her storage system but I promise you it was there somewhere. Well, with such wonderful muses, how could I go wrong?
Let's think about that for a minute. There are probably a number of ways we could go wrong.
I don't think there are many things in this world requiring a man (a couple are nicer with one around but most can be accomplished without one). On my list of times a man comes in handy:
1. when the car breaks down or you are in an accident
2. when you need a mouse trap set or removed
3. give me time and I can probably come up with a few more.
However, it is nice to have a guy around to build things. I find they are often quite pleased to pull out a bunch of tools and show everyone they are oh so handy. So, when I explained to Da what I wanted (large piece of wood with wheels on the bottom and a rim to keep the shelves in and a matching piece on top to use as a work area) I thought, now I'm done. He will do this and I will have a work space. But NO. Even when I pulled up the wonderful pictures and description from Diane, no go. So, I said, I'm off to Home Depot to get the wood. I think I'll buy 3/4 inch particle board. Do you need anything? Da responded, "Oh you don't need 3/4 inch. That will be too big." Me, "But these shelves are likely to weigh 500 pounds or so, it is a lot of paper"
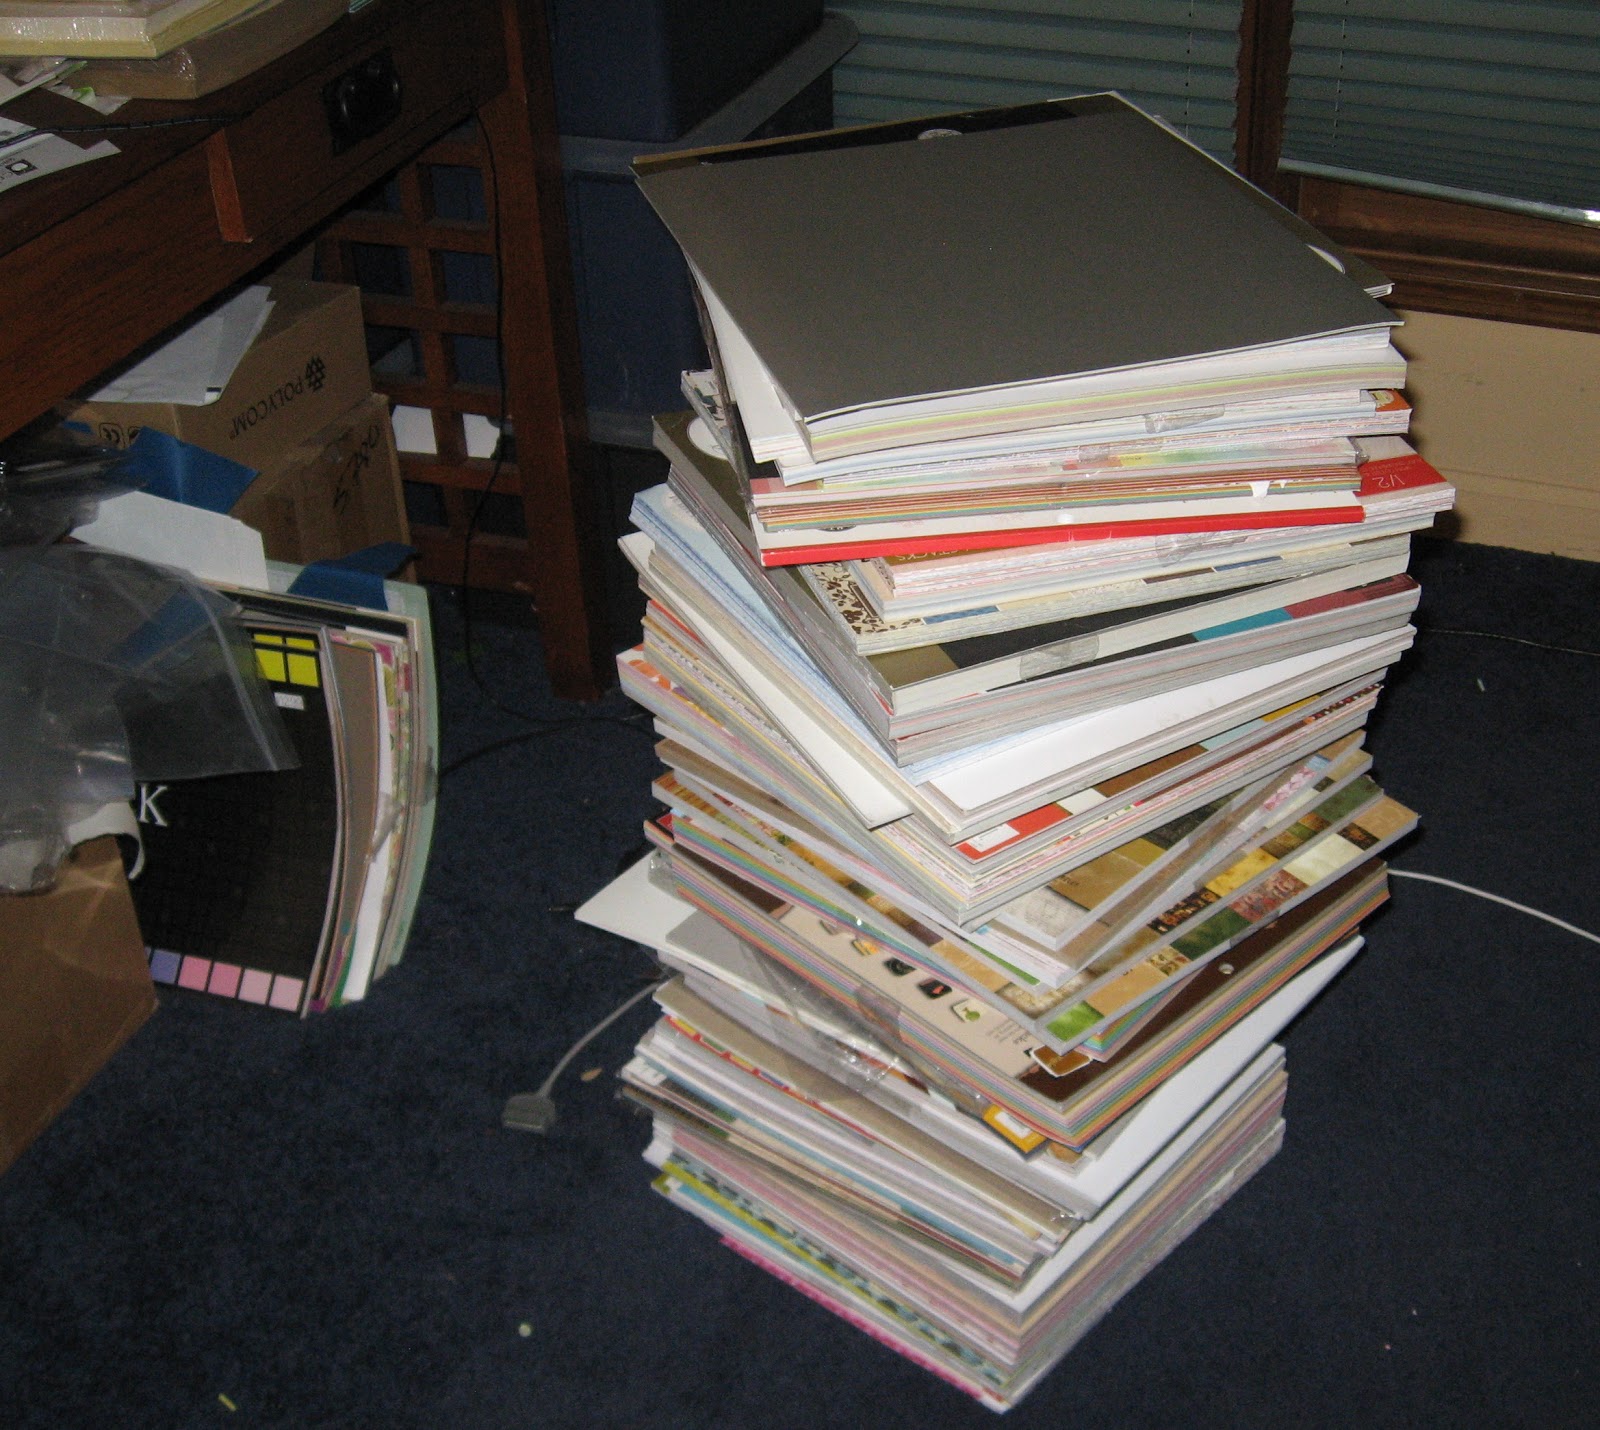
 |
| This is just one stack of the paper I needed to get off the floor and organized. |
Da: "No, you don't need anything that thick.
So, I bought the wood per Da's specifications. I bought the trim, the wheels and painted the wood. I had everything ready for assembly. I even assembled the shelves with the constant help of the Wonderkid. I think it only took me twice as long with his help but he was quite pleased.
I put everything together and then started to put the paper on the shelves. And do you know what happened, it started to bend. Why? Because 500 pounds of paper is heavy. The next morning (as he is getting ready to jet off to Italy) Da becomes interested in this project. He comes into the scrap area and looks at the bent island and says, "My that is a lot of paper, it is too heavy for that wood." I held back and didn't throttle him. I wasn't able to bite my tongue though. My retort, yes, I said it would weigh about 500 pounds.
So, off to the store I go to buy more wheels (I decided if I put them in the middle the whole thing won't buckle and I'll be able to salvage the work I had already done). Plus, Da had jetted off by this time and I don't have directions for using the miter saw, drill press and other lovely items necessary for recreating the work I'd already done. So, my island now has 8, count them, 8 wheels.

But let me tell you, it doesn't buckle.
Here is the island without the top or extra wheels. I know it looks a little odd to have birch shelves and a white base and top but I thought I was more likely to use the shelves in another way if they were birch as opposed to white or black but I wasn't willing to spend a ton of money on the top and bottom so they needed to be painted.
Here is the side of the island with a lot of the stuff in it. I love the fact that I can put 24 inch rolls of vinyl or packs of paper and still have room on the other side for some narrow items.
Here was my workdesk last week. I was trying to get the travel journal finished for Da and Moma to take with them to Italy (part of the reason I wanted the island done last week).
 |
Venice stamp and other Dark Room Door stamps -- I love these stamps from Australia.
|
The other exciting thing, I was able to fit my light box in my crafting space instead of two floors down in the basement. It was a pain to take a quick picture because I was going up and down the stairs. It was also in the middle of the room so everyone was taking down the lights. Now, it has its own corner.
So, what is on my NEW workdesk?
I need to finish the birthday card for my great aunt's 81st birthday. I have a number of pieces I need to vinyl and the Wonderkid is having a playdate with some friends to do shaving cream painting on the butcher paper. I have almost a dozen projects I need to write-up for the blog, including all of the items I made for a 4 year old birthday. What do you think? Isn't it exciting?
Have a great Wednesday.